3D Segmentation with nnU-Net and the Datamint Trainer API
This notebook trains a volumetric segmentation model on the Synapse Multi-Organ CT dataset using Datamint’s NNUNetTrainer.
What is nnU-Net?
Isensee, F., Jaeger, P. F., Kohl, S. A. A., Petersen, J., & Maier-Hein, K. H. (2021). nnU-Net: A self-configuring method for deep learning-based biomedical image segmentation. Nature Methods, 18(2), 203–211.
nnU-Net is a self-configuring segmentation framework — you don’t design a network architecture or tune hyperparameters. Instead, nnU-Net analyses your dataset and automatically decides:
Architecture — 2D U-Net, 3D U-Net full-resolution, or 3D cascade (two-stage for very large volumes)
Patch size and batch size — derived from GPU memory target and the median image spacing
Preprocessing — target spacing, intensity normalisation strategy (CT clipping, MRI z-score, etc.)
Data augmentation — rotation, scaling, elastic deformations, mirroring, based on dataset characteristics
This self-configuration happens in two offline phases (fingerprinting and planning) before any training starts, and the result is saved to nnUNetPlans.json. See Section 4 for a full breakdown of each pipeline step.
What You’ll Learn
Download and convert the Synapse Multi-Organ CT dataset to NIfTI
Upload 3D volumes and segmentation masks to a Datamint project
Train a
NNUNetTrainer— the entire pipeline (export → fingerprint → preprocess → train → predict → import) runs in a singletrainer.fit()callInspect MLflow-tracked metrics and visualise predictions on axial slices
Required Dependencies
pip install datamint nibabel h5py "nnunetv2>=2.4,<3.0"
⚠️ Dataset Access
The Synapse dataset is hosted on Kaggle: https://www.kaggle.com/datasets/dogcdt/synapse
[1]:
%pip install -q datamint gdown nibabel h5py "nnunetv2>=2.4,<3.0"
Note: you may need to restart the kernel to use updated packages.
[5]:
from datamint import Api

PROJECT_NAME = "NNUNET__TEST_Synapse_Tutorial"
api = Api()
1. Setup: Create Project and Load Dataset
Label map (8 abdominal organs):
Value |
Organ |
Value |
Organ |
|---|---|---|---|
1 |
aorta |
5 |
right_kidney |
2 |
gallbladder |
6 |
liver |
3 |
spleen |
7 |
stomach |
4 |
left_kidney |
8 |
pancreas |
datamint.examples.synapse_dataset downloads the Synapse Multi-Organ CT dataset, converts each HDF5 volume to NIfTI (.nii.gz, downsampled 2x in-plane), and uploads the CT volumes and organ segmentation masks to a Datamint project. The call is idempotent, if the project already exists, it’s returned as-is without re-uploading.
[ ]:
from datamint.examples import synapse_dataset

proj = synapse_dataset.create(project_name=PROJECT_NAME, api=api)
proj
1.1 Assign Train / Test Splits
nnU-Net manages its own internal cross-validation within the training data, so there is no separate validation split here. We only need to tell Datamint which resources are for training and which are for testing (held-out evaluation after training).
[4]:
import random

all_resources = list(api.resources.get_list(project_name=PROJECT_NAME))
all_resources.sort(key=lambda r: r.filename)

random.seed(42)
random.shuffle(all_resources)

n = len(all_resources)
n_train = int(0.70 * n)
n_test   = int(0.30 * n)

api.projects.assign_splits(all_resources[:n_train], split_name='train', project=proj)
api.projects.assign_splits(all_resources[n_train:n_train + n_test], split_name='test', project=proj)

print(f"Train: {n_train}  Test: {n_test}")
Train: 8 Test: 3
2. Train with nnU-Net
NNUNetTrainer.fit() runs the full nnU-Net pipeline in a single call. Here is what happens under the hood:
Step |
Description |
|---|---|
1. Export |
Each Datamint resource is written as a |
2. Fingerprinting |
Analyses all training volumes: median voxel spacing, intensity histogram, image size distribution. Result: |
3. Planning |
Uses the fingerprint to select patch size, batch size, network depth, and pooling strides. Result: |
4. Preprocessing |
Resamples all volumes to the planned target spacing, clips/normalises intensities, and writes compressed |
5. Training |
Runs the nnU-Net trainer for |
6. Prediction |
Runs sliding-window inference on the |
7. Import |
Uploads predictions back to Datamint as volume segmentation annotations |
8. Register |
Bundles |
Skip logic: fingerprinting, planning, and preprocessing are skipped on re-runs if their output files already exist.Resume training: passcontinue_training=Trueto load from the last checkpoint.
Configuration Reference
Parameter |
Values |
Notes |
|---|---|---|
|
|
|
|
|
|
|
int |
nnU-Net’s default is 1000; use 2–5 here just to validate the pipeline |
[6]:
from datamint.lightning import NNUNetTrainer

trainer = NNUNetTrainer(
    project=PROJECT_NAME,
    # '2d' is fast and GPU-light. Use '3d_fullres' for best accuracy on isotropic data (needs ~8 GB VRAM).
    configuration='2d',
    # One of the 5 cross-validation folds (0–4). fold=0 trains on the first 80% of cases.
    fold=0,
    # For a real experiment use max_epochs=1000 (nnU-Net's default).
    # Setting 2 here just to verify the pipeline runs end-to-end quickly.
    max_epochs=3,
)
[ ]:
results = trainer.fit()
What fit() returns
NNUNetTrainer.fit() returns a dict with two keys:
Key |
Type |
Description |
|---|---|---|
|
|
The trained nnU-Net trainer instance. Provides |
|
|
The MLflow registered model name. Pass this to |
Metrics (Dice, loss) are tracked in MLflow and can be retrieved through the model registry facade with api.models.get_by_name(model_name).get_latest_version().get_metrics(), without going through mlflow.MlflowClient() directly.
[7]:
from pathlib import Path

bridge = results['bridge']
model_name = results['model_name']

print(f"Registered model : {model_name}")
print(f"Fold output dir  : {bridge.output_folder}")
print(f"Predictions dir  : {bridge.output_folder_base}/predictions_test")

final_ckpt = Path(bridge.output_folder) / 'checkpoint_final.pth'
print(f"Final checkpoint : {'✓ exists' if final_ckpt.exists() else '✗ not found'}")

# List prediction files (if any)
pred_dir = Path(bridge.output_folder_base) / 'predictions_test'
if pred_dir.exists():
    preds = sorted(pred_dir.glob('*.nii.gz'))
    print(f"Predictions      : {len(preds)} file(s) — {[p.name for p in preds]}")
else:
    print("Predictions      : none (no 'test' split was assigned, or prediction step was skipped)")
Registered model : NNUNET__TEST_Synapse_Tutorial
Fold output dir  : /home/luan/.cache/datamint/nnunet/results/Dataset001_NNUNETTESTSynapseTutorial/_DatamintNNUNetTrainer__nnUNetPlans__2d/fold_0
Predictions dir  : /home/luan/.cache/datamint/nnunet/results/Dataset001_NNUNETTESTSynapseTutorial/_DatamintNNUNetTrainer__nnUNetPlans__2d/predictions_test
Final checkpoint : ✓ exists
Predictions      : 3 file(s) — ['case_009.nii.gz', 'case_010.nii.gz', 'case_011.nii.gz']
Inspect the Registered Model
Use api.models to inspect the registered model without touching MLflow’s client directly:
[ ]:
registered_model = api.models.get_by_name(model_name)
latest_version = registered_model.get_latest_version()

print(f"Version: {latest_version.version}")
print(f"Task type: {latest_version.get_task_type()}")
print(f"Supported modes: {latest_version.get_supported_modes()}")
print("Metrics:")
for metric_name, value in latest_version.get_metrics().items():
    print(f"  {metric_name}: {value}")
3. Visualise Predictions
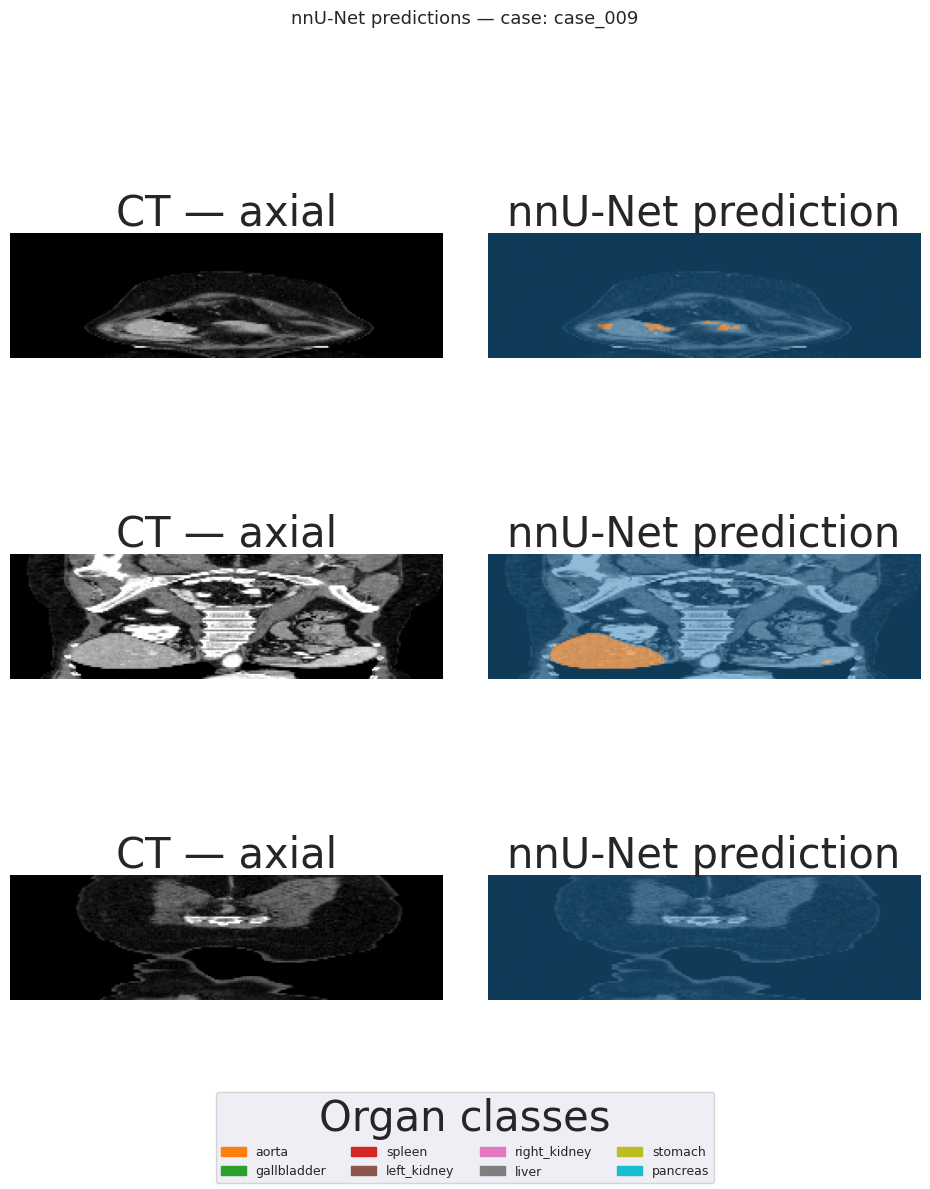
After training, nnU-Net writes test-set predictions to {output_folder_base}/predictions_test/ as NIfTI label maps. Each integer value in the label map corresponds to an organ class (matching the SYNAPSE_CLASSES dict defined below).
The cell below loads up to two test cases, displays three axial slices per case, and overlays the predicted segmentation on the raw CT.
[11]:
%matplotlib inline
from pathlib import Path

import matplotlib.pyplot as plt
import nibabel as nib
import numpy as np

bridge = results['bridge']
pred_dir = Path(bridge.output_folder_base) / 'predictions_test'
pred_files = sorted(pred_dir.glob('*.nii.gz')) if pred_dir.exists() else []

if not pred_files:
    print(
        "No predictions found.\n"
        "Make sure a 'test' split was assigned before training and that training completed.\n"
        f"Expected prediction dir: {pred_dir}"
    )
else:
    # Locate the exported test images so we can display CT + prediction side-by-side.
    # The exporter writes them to: nnunet_work_dir/raw/Dataset{id}_{name}/imagesTs/
    raw_dir = trainer.nnunet_work_dir / 'raw'
    dataset_dir = min(raw_dir.glob('Dataset*'))
    imagesTs_dir = dataset_dir / 'imagesTs'

    SYNAPSE_CLASSES = {
        1: 'aorta', 2: 'gallbladder', 3: 'spleen',
        4: 'left_kidney', 5: 'right_kidney', 6: 'liver',
        7: 'stomach', 8: 'pancreas',
    }
    num_classes = len(SYNAPSE_CLASSES)
    CMAP = plt.get_cmap('tab10', num_classes + 1)

    for pred_path in pred_files[:1]:  # show at most 2 cases to keep the notebook manageable
        case_id = pred_path.name.replace('.nii.gz', '')
        # Test images are stored as {case_id}_0000.nii.gz (channel-0 suffix added by exporter)
        img_path = imagesTs_dir / f'{case_id}_0000.nii.gz'

        pred_nii = nib.load(str(pred_path))
        pred_vol = pred_nii.get_fdata().astype(np.int32)

        if img_path.exists():
            ct_vol = nib.load(str(img_path)).get_fdata()
        else:
            ct_vol = np.zeros_like(pred_vol, dtype=np.float32)

        # nnU-Net uses (H, W, D) orientation; pick 3 evenly-spaced axial slices
        D = pred_vol.shape[2]
        slice_indices = [D // 4, D // 2, 3 * D // 4]

        fig, axes = plt.subplots(len(slice_indices), 2, figsize=(10, 4 * len(slice_indices)))
        fig.suptitle(f'nnU-Net predictions — case: {case_id}', fontsize=13)

        for row, s in enumerate(slice_indices):
            ct_slice   = ct_vol[:, :, s]
            pred_slice = pred_vol[:, :, s]

            axes[row, 0].imshow(ct_slice, cmap='gray')
            axes[row, 0].set_title('CT — axial')
            axes[row, 0].axis('off')

            axes[row, 1].imshow(ct_slice, cmap='gray')
            axes[row, 1].imshow(pred_slice, cmap=CMAP, alpha=0.5, vmin=0, vmax=num_classes)
            axes[row, 1].set_title('nnU-Net prediction')
            axes[row, 1].axis('off')

        handles = [plt.Rectangle((0, 0), 1, 1, color=CMAP(i + 1)) for i in range(num_classes)]
        labels  = list(SYNAPSE_CLASSES.values())
        fig.legend(handles, labels, loc='lower center', ncol=4, fontsize=9, title='Organ classes')
        plt.tight_layout()
        plt.show()
4. Deployment
The trainer automatically registered a deployment-ready model in MLflow after training. You can deploy it directly to the Datamint server:
[13]:
job = api.deploy.start(
    model_name=PROJECT_NAME,
    model_alias="latest",
    with_gpu=True,
)

print("Deployment job started!")
print(f"Job ID: {job.id}")
print(f"Status: {job.status}")
Deployment job started!
Job ID: 7daff4f4-caf9-40bd-9584-e417b6600c0f
Status: running
[18]:
job = api.deploy.get_by_id(job.id)

print(f"Job Status: {job.status}")
print(f"Progress:   {job.progress_percentage}%")

if job.error_message:
    print(f"Error: {job.error_message}")
Job Status: completed
Progress:   100%
Model.is_deployed() reports the same thing, without tracking job IDs, once the job above reaches completed.
[ ]:
registered_model.is_deployed()
4.1 Remote Inference
[ ]:
r = api.resources.get_list(project_name=PROJECT_NAME, limit=1)[0]

inf_job = api.inference.submit(
    model_name=PROJECT_NAME,
    model_alias="latest",
    resource_id=r.id,
)
inf_job.wait()
4.2 Visualise Inference Result
After the inference job completes, the predicted segmentation is uploaded back to the resource as an annotation. The cell below fetches the CT and the predicted segmentation and displays them side by side on three axial slices.
[ ]:
%matplotlib inline
import matplotlib.pyplot as plt
import numpy as np

# Fetch CT volume
ct_nifti = r.fetch_file_data(use_cache=True, auto_convert=True)
ct_vol = ct_nifti.get_fdata()

# Fetch the predicted segmentation (most recent annotation on this resource)
annotations = list(r.fetch_annotations())
pred_ann = annotations[-1]
pred_vol = pred_ann.fetch_file_data(auto_convert=True, use_cache=True)

SYNAPSE_CLASSES = {
    1: 'aorta', 2: 'gallbladder', 3: 'spleen',
    4: 'left_kidney', 5: 'right_kidney', 6: 'liver',
    7: 'stomach', 8: 'pancreas',
}
num_classes = len(SYNAPSE_CLASSES)
CMAP = plt.get_cmap('tab10', num_classes + 1)

# nnU-Net volumes are (H, W, D) — pick 3 axial slices
D = ct_vol.shape[2]
slice_indices = [D // 4, D // 2, 3 * D // 4]

fig, axes = plt.subplots(len(slice_indices), 2, figsize=(10, 4 * len(slice_indices)))
fig.suptitle(f'nnU-Net inference result — {r.filename}', fontsize=13)

for row, s in enumerate(slice_indices):
    ct_slice   = ct_vol[:, :, s]
    pred_slice = pred_vol[:, :, s]

    axes[row, 0].imshow(ct_slice, cmap='gray')
    axes[row, 0].set_title(f'CT — axial slice {s}')
    axes[row, 0].axis('off')

    axes[row, 1].imshow(ct_slice, cmap='gray')
    axes[row, 1].imshow(pred_slice, cmap=CMAP, alpha=0.5, vmin=0, vmax=num_classes)
    axes[row, 1].set_title('nnU-Net Prediction')
    axes[row, 1].axis('off')

handles = [plt.Rectangle((0, 0), 1, 1, color=CMAP(i + 1)) for i in range(num_classes)]
fig.legend(handles, list(SYNAPSE_CLASSES.values()), loc='lower center', ncol=4, fontsize=9, title='Organ classes')
plt.tight_layout()
plt.show()